Online entries
You can design a branded, mobile-friendly online form to collect entries for your draw. We will give you a link or QR code that your audience can use to enter their details online. You’ll run your draw from these entries, and pick a winner live.
Design your form |
Publish QR code |
Draw a winner live |
|

|

|
What can I use this for?
- Expo stands and trade shows
Collect leads at your next expo or demo day - now you have contact details for everyone who visited your booth
Run a draw on the last day
- Events and meetings
Encourage attendance - let people know you’ll be running a lucky draw for everyone who attends your meeting, conference or event
They scan the QR code during the event - draw a winner from those who are there
Use it at the start of the event to collect registrations, or during the event to collect feedback
Or publish the link before the event to collect RSVPs and preferences or special needs
- Store walk-ins and sales promotions
Put a QR code at your tillpoint or store entrance
Let customers scan as they enter or pay
Run a prize draw for those who have entered
- Online contests and giveaways
Publish your link or QR code online
Let your audience enter your competition or raffle
If you want to link this to sales, get them to fill in a proof of purchase on their entry form
- Surveys and market research
Encourage participation and collect your data at the same time!
Set up your form with your survey questions, and then draw a winner from participants.
Overview
Here’s an overview of how to collect online entries with Lucky Draw Plus. Don’t worry! The setup is easy, and we’ll guide you every step of the way.
SET UP YOUR ENTRY FORM
- Create your online entries form:
Use our template and form builder - easy, quick setup
Customise the look of your form - background, logo and organisation and draw names
Decide what fields you want to collect, for example firstname, lastname, mobile number
Set up a draw information page with the details and Ts and Cs of your draw
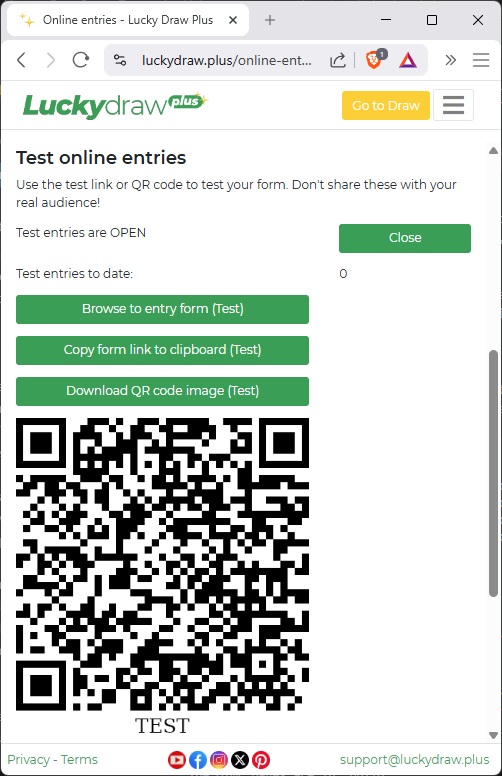
- Test your form
Use the test link or QR code to test your entry form
Keep making changes until you are happy
COLLECT YOUR ENTRIES
- Activate your live online entries
You will use 10 credits to activate your live entries, no matter how many entries you are going to collect
Open and close your live entries as required
- Send your audience to your live entry form
Give them the live link, or
Publish the live QR code so they can scan it to enter
- Validate your entries
Monitor your entries as they come in in realtime on your live dashboard
Mark any entries Invalid if required
RUN YOUR DRAW
Close your entries when you are ready
Download your valid entries file
Load your entries, and draw your winners live with fun animation and sound
Fully transparent live draw in-person or livestreamed, with winner certificates
Now let’s look at each step in a little more detail:
Set up your entry form
Create your online entry form
After logging in to Lucky Draw Plus, from the menu, go to Online entries
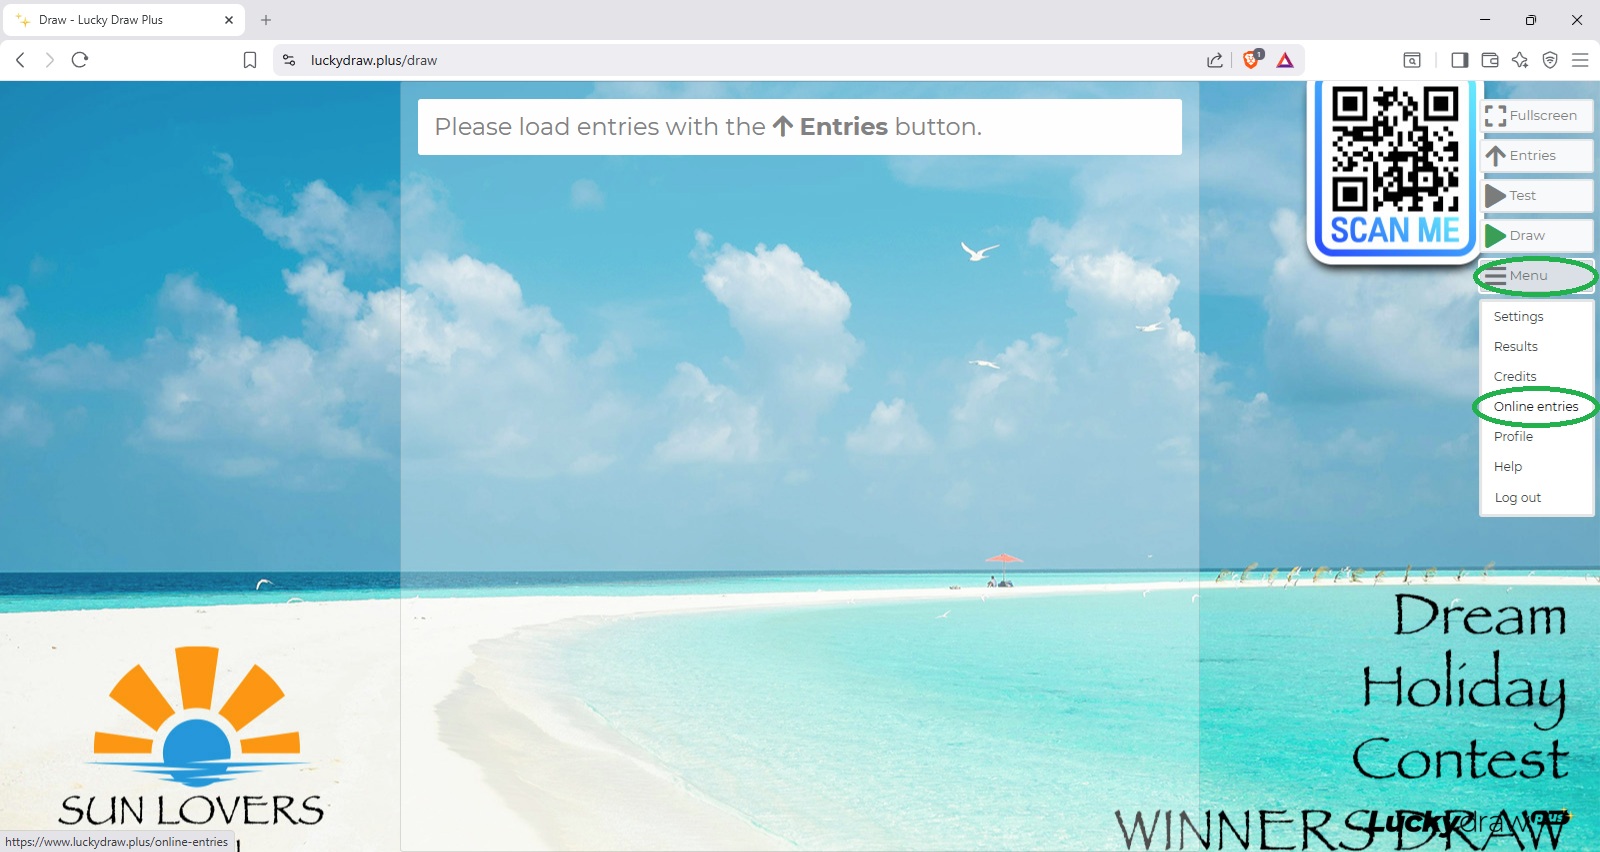
If your profile has not yet been completed you’ll be asked to do that first (we need your organisation name to include on your entry form.)
Click Create entry form.
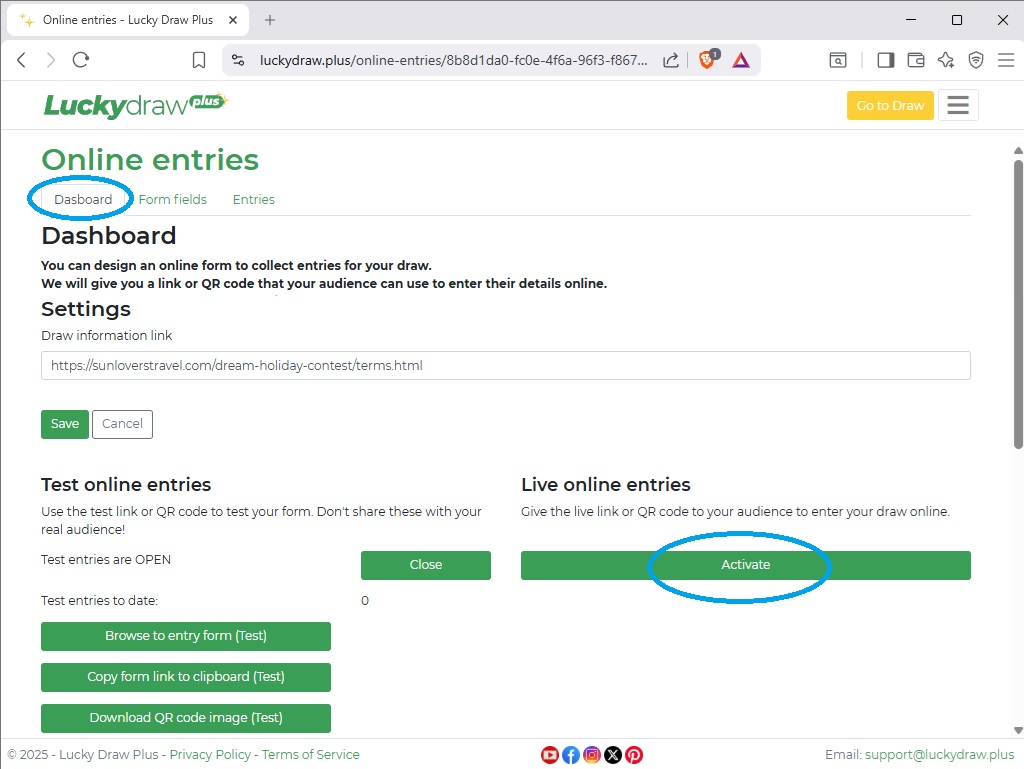
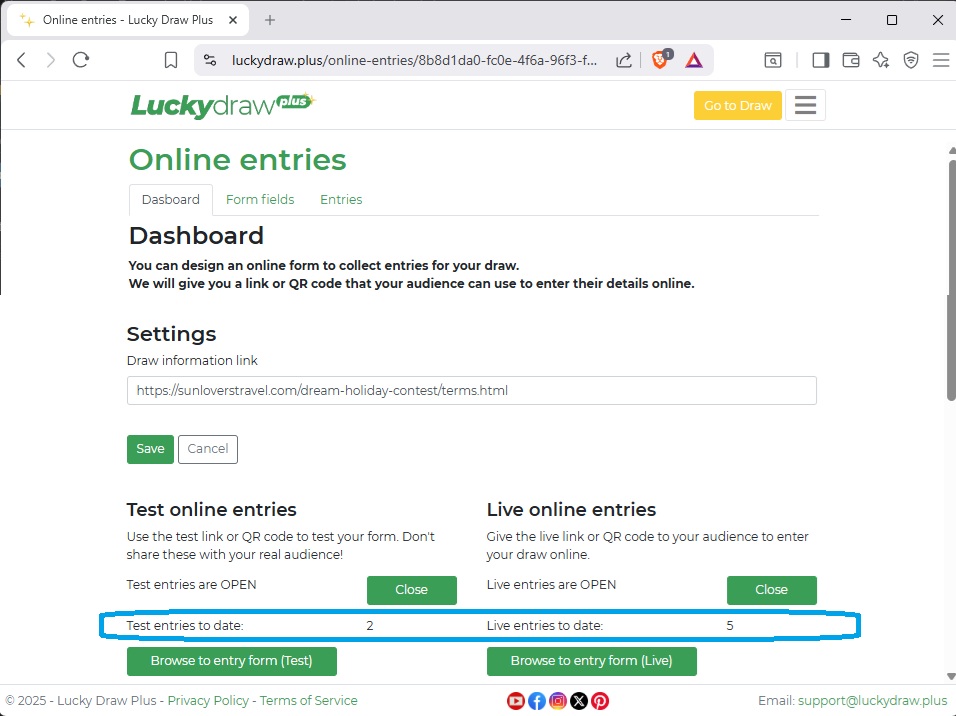
Access your online entries Dashboard
Your online entry Dashboard opens. From here you can set up and test your form, and then activate and open your live online entries.
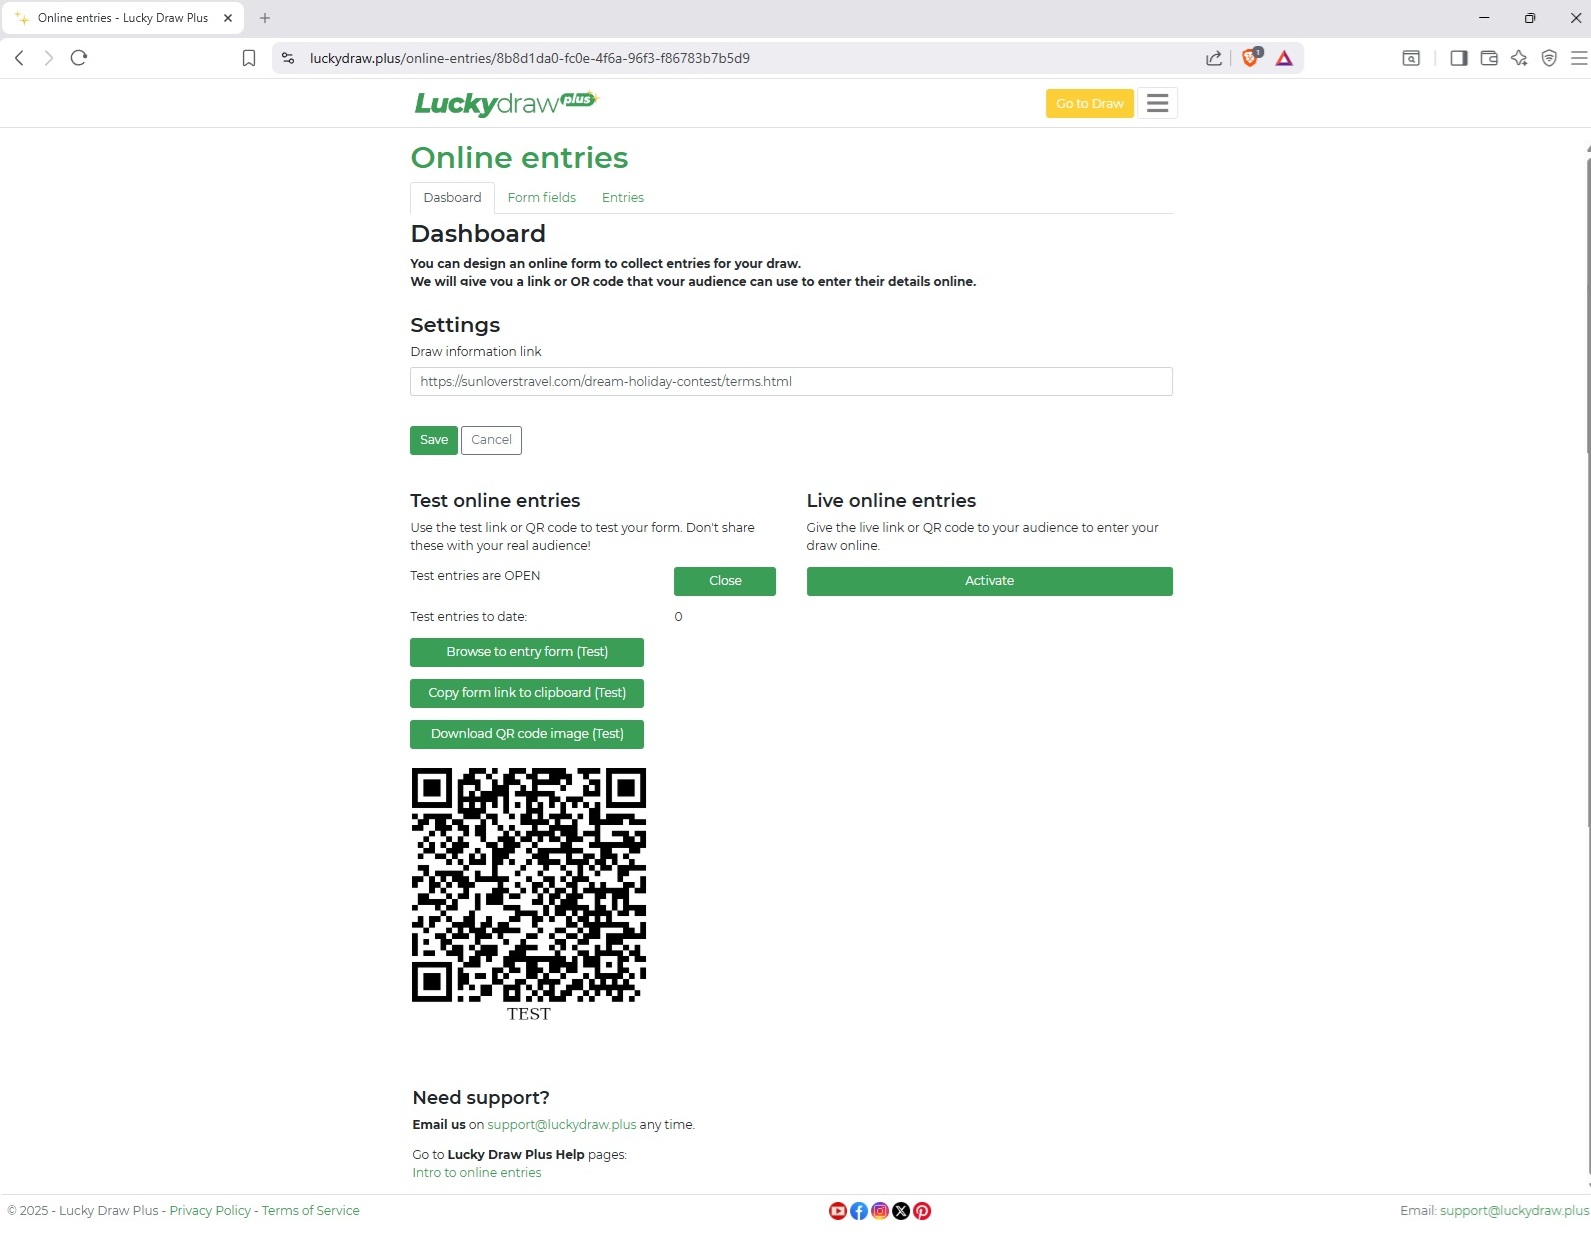
Your test entry form is working and ready to test.
Access it by clicking the Browse button, or scanning the QR code.
Test forms have a “Test” watermark on them, but otherwise look and behave exactly as your live form will do.
You can now tweak your form styling, complete your settings, or change the default fields for your form.
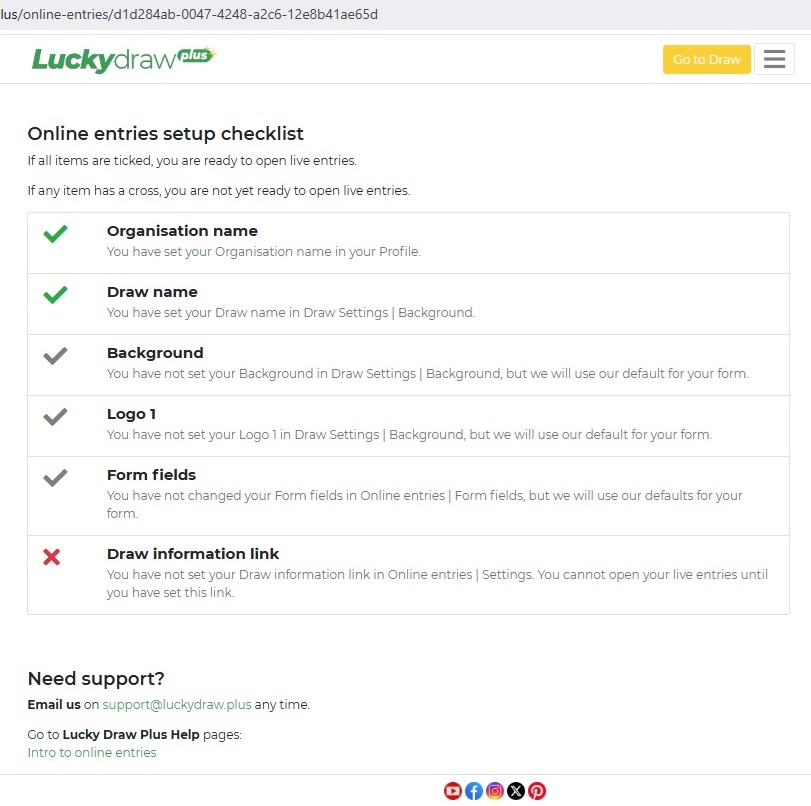
Online entries setup checklist
A checklist at the bottom of your dashboard will help you make sure you have everything you need to open live entries.
See also Test your entry form for what to test before you activate live entries.
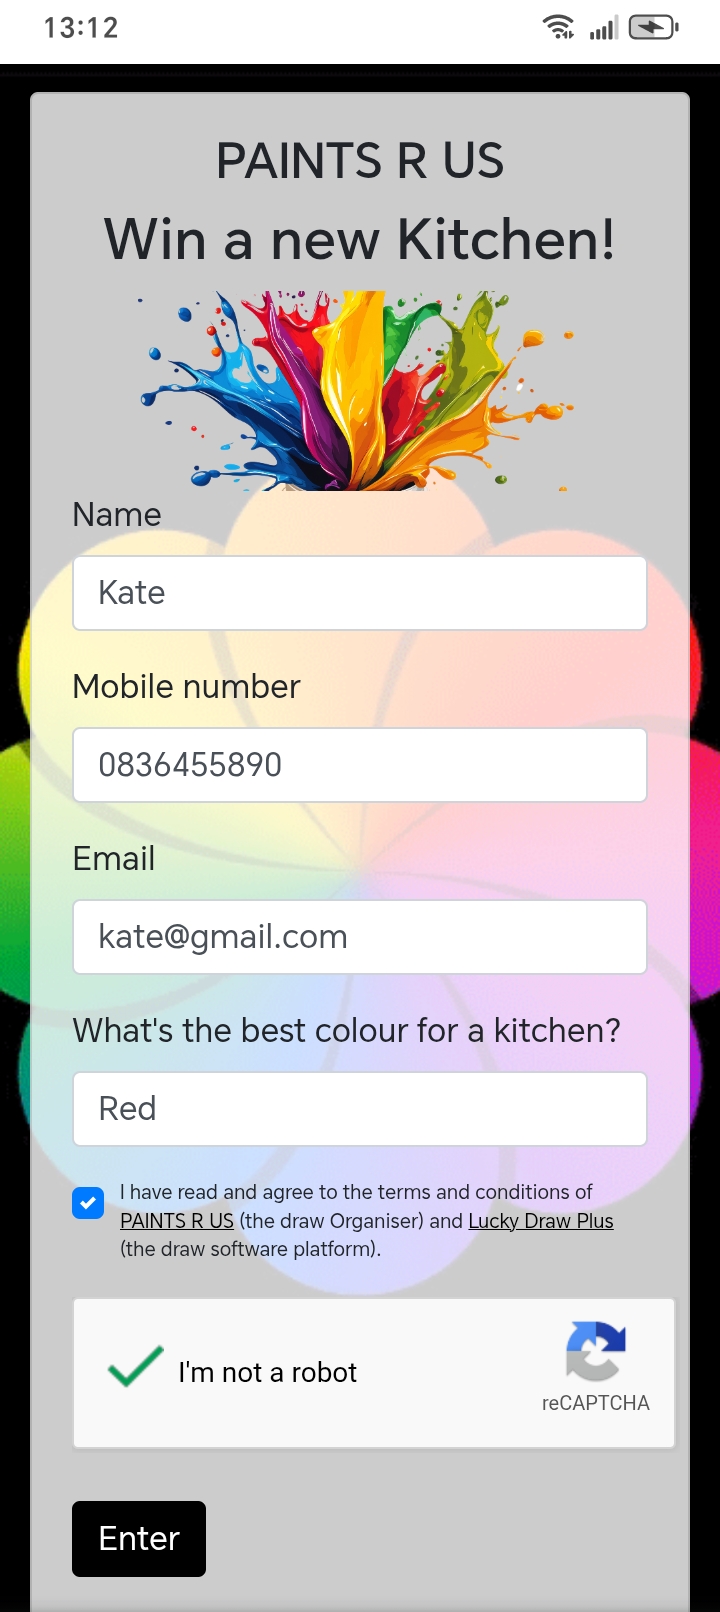
What your entry form looks like
We’ll give you a template and a form builder to create your own branded mobile friendly form.
|
|

|
|
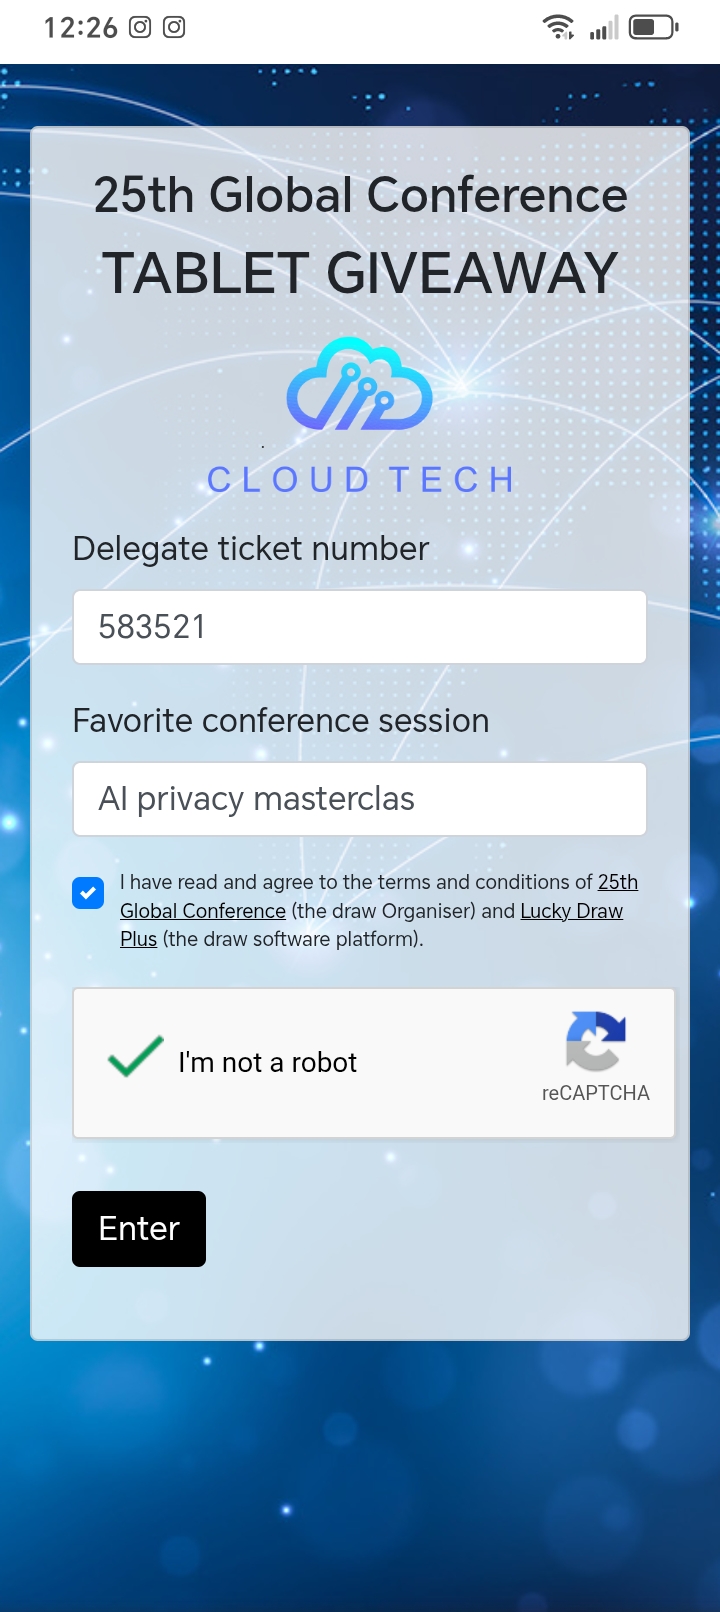
Your entry form will include (from the top down):
Your draw background image
Your organisation name
Your draw name
Your logo 1
Your entry form fields (we’ll start you off with first and last name, email and mobile number fields by default but you can change these)
A checkbox for entrants to agree to your Ts and Cs and ours (with a link through to your draw information page)
A reCAPTCHA challenge to make sure your entries aren’t bots
See also Set up your entry form fields for things to think about when choosing and setting up your form fields.
See also Create your draw information page for ideas on what to include in your Ts and Cs.
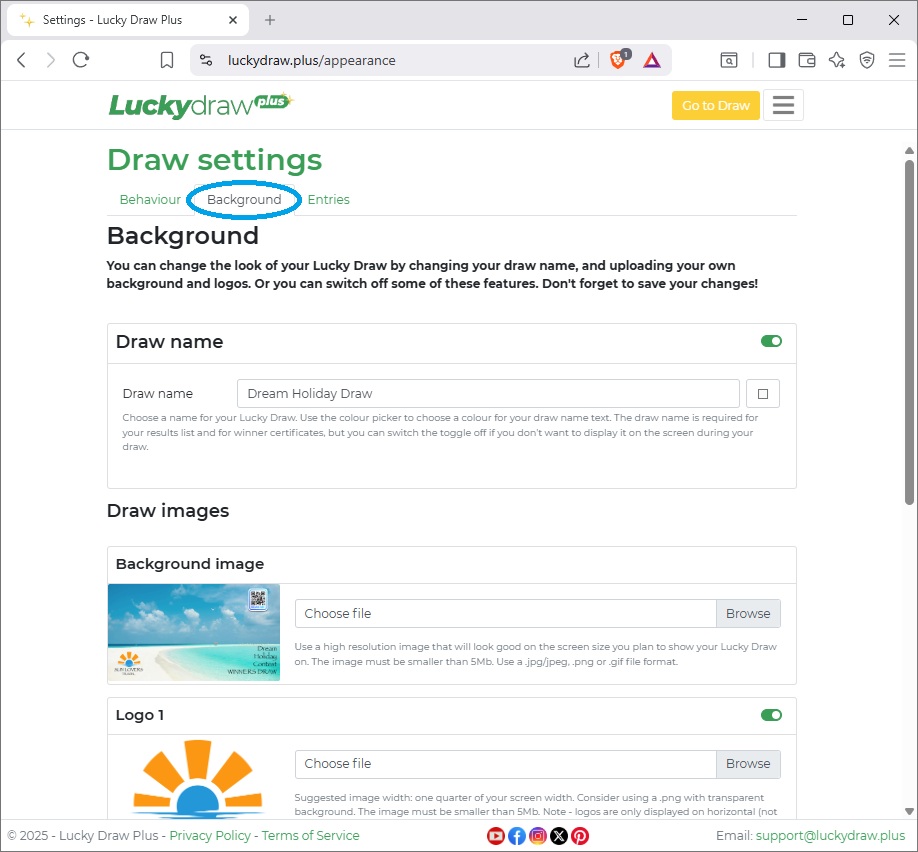
Where to edit your entry form styling:
Your organisation name comes from your Profile
Your draw name, background image and logo 1 can be edited in your Settings | Background page. If you have not made changes here, the Lucky Draw Plus defaults will be used.
Top tip! Make your background and logo filesizes as small as possible, so your form loads quickly for your users.
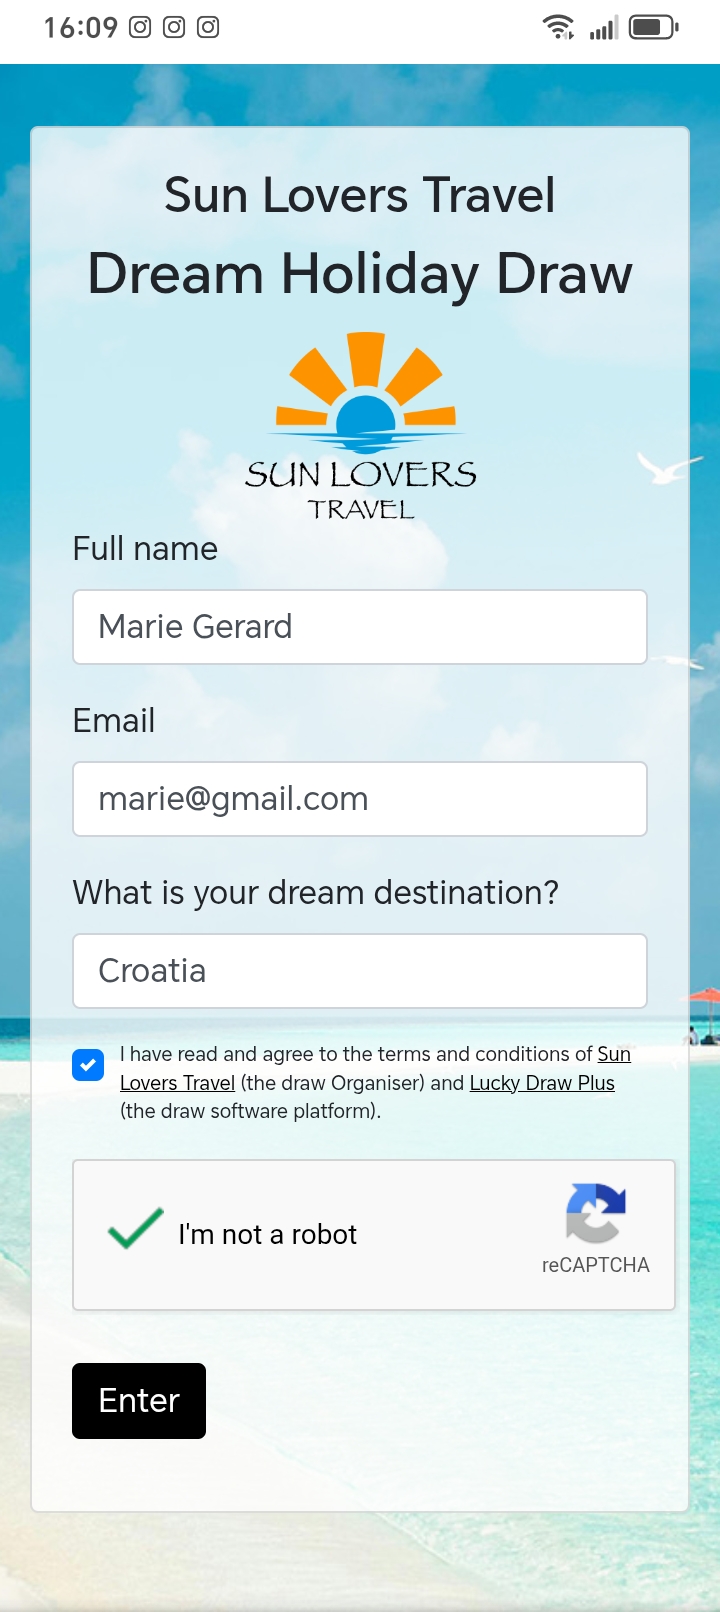
Your entry form is responsive, so it will scale and look great on any device from mobiles and tablets to larger screens like desktop or laptops, with the mobile friendly version using the centre panel of your background.
Create your draw information page
You will want to give people some information about your draw, for example what the prizes are, the draw date, any terms and conditions and so on.
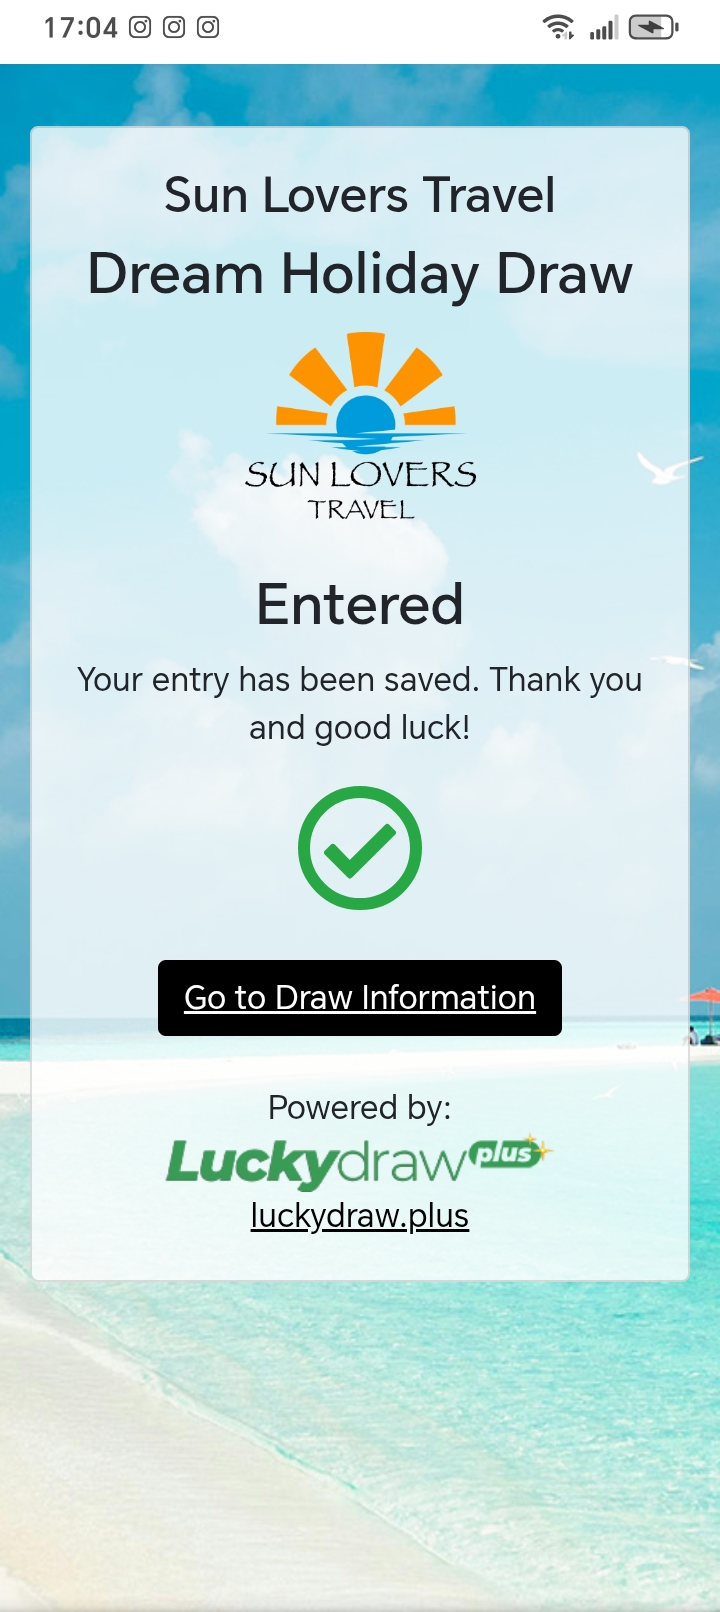
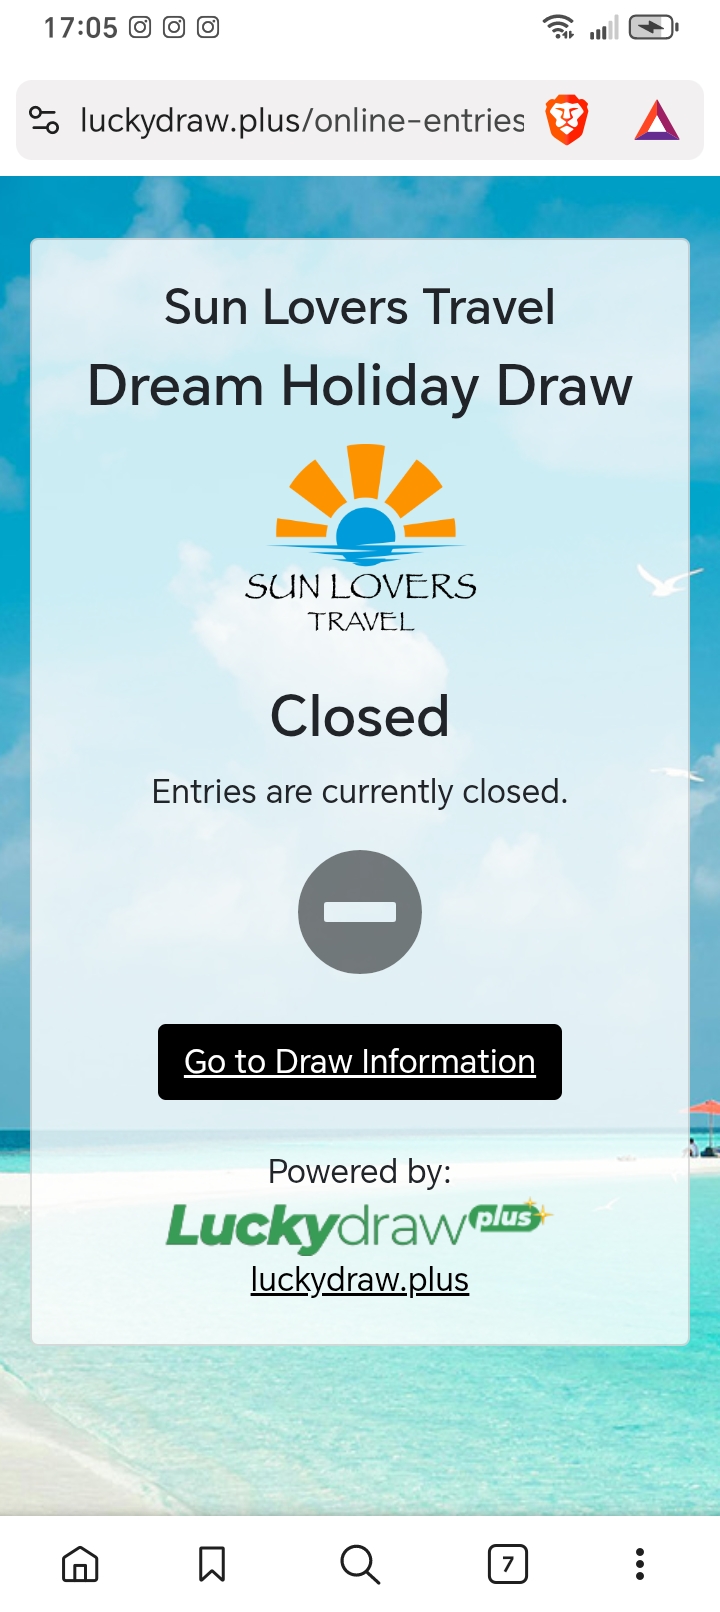
We will ask people to agree to these Ts and Cs when they enter, and we will direct them to your draw information page after they have successfully entered, or if they get to your form when the draw is currently closed.
|
|
|
Consider including some of the following information on your draw information page:
Entry opening and closing dates
Draw date, time and place
Who can enter (or who cannot enter)
What the prizes are
How winners will be notified and when
How prizes will be distributed and when
Any other terms and conditions of your draw (make sure you check your local regulations)
Contact information for queries about the draw
Any personal information handling policy information in line with your country’s requirements
If you would like to contact them later for marketing purposes, you could make this a condition of entry to your draw
You won’t put your draw information into Lucky Draw Plus. Instead, you should set out this information on your own site. It could be
on a page on your website or blog
a social media post
an online document that your users can access.
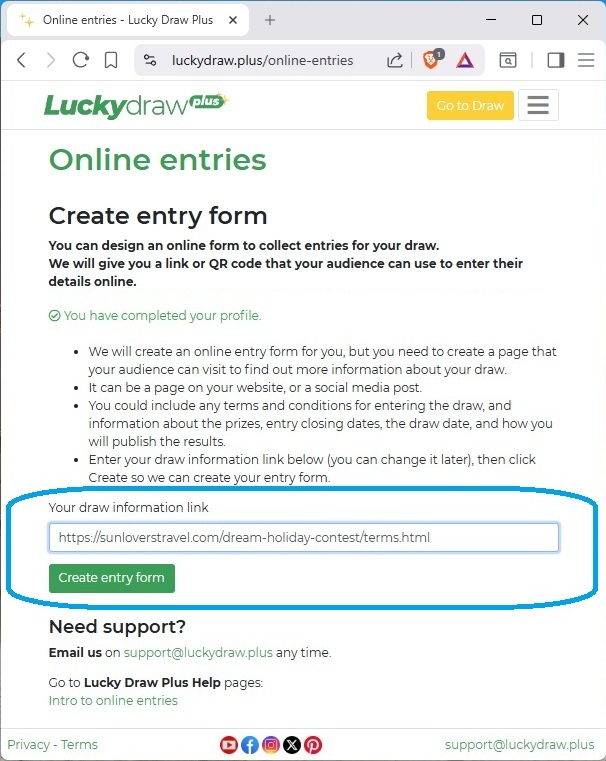
Once you have set up your draw information, enter the link to this page into Lucky Draw Plus on the Online entries | Settings tab.
Top tip! After your draw, publish your results on this same Draw information page - people already have the link.
Check your online entries settings
On the settings tab you can enter settings for your Online entries campaign.
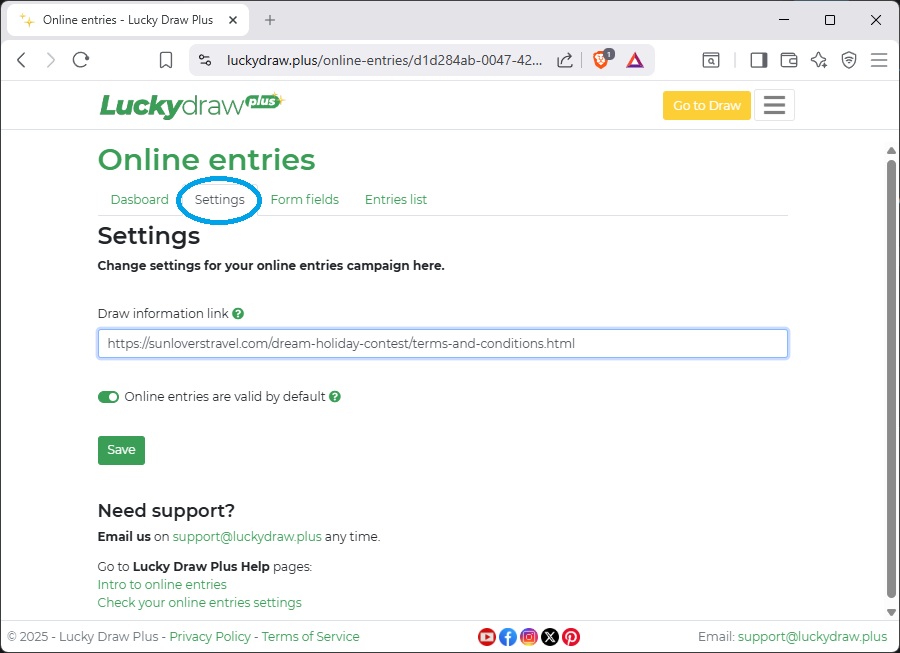
Draw information link
This is a link to a page on your website, blog or social media where people can get more information about your draw, and especially any terms and conditions. You will need to enter your draw information link before you can open your live entries.
See also Create your draw information page for ideas of what to include.
Online entries are valid by default
You can control whether entries into your draw start off as Valid by default, or start off as Unknown so that you can make them Valid yourself after checking them.
When you create an online entry campaign, this setting is set to on (Valid) by default.
This is the easiest way to run a draw, because then all entries are automatically Valid, and you don’t need to do anything, unless you specifically choose to make them Invalid.
If you want to check each of your entries individually, and only make them Valid once you have checked them, then take this setting off. Now you’ll be able to filter between:
Unknown - new entries that you have not yet checked
Valid - the ones you have already approved
Invalid - the ones you have rejected
See also Validate your entries
Set up your entry form fields
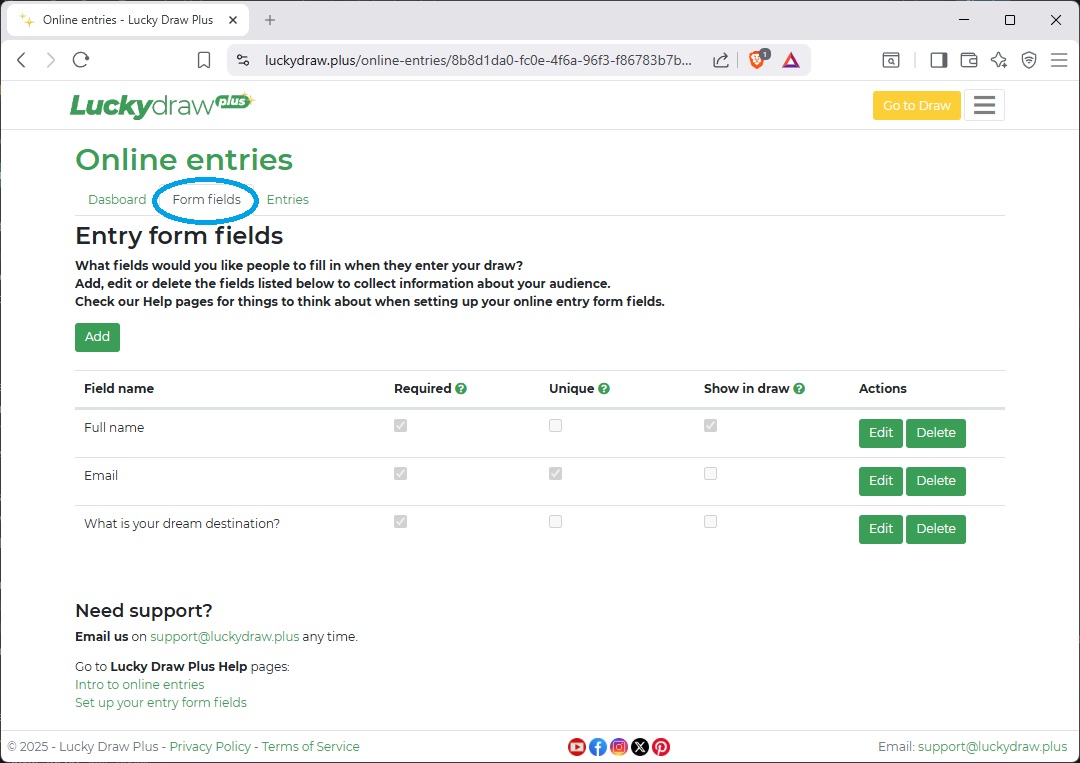
You can view and make changes to the fields on your entry form on the Form fields tab.
By default, we will start your form off with the following fields:
First name
Last name
Email
Mobile number
You can edit or delete these fields, or add your own new ones. Fields will show up on the entry form in the order in which they are displayed in the Form fields setup tab.
What fields should you include?
Include any fields that you want to show up to your audience when you pick the winner, for example first name and lastname, or ticket number
Include at least one field that will allow you to contact the entrant if they win, for example email or mobile number
If you want to make sure that people can only enter your draw once, or you want to be able to uniquely identify each person, include a field that is likely to be unique, such as national identity number, mobile number or product serial number
If you are collecting data for another purpose over and above a draw or contest, for example sales leads or market research, include the fields you would like to collect
If regulations in your country require entrants into a draw or contest to answer a question, include this question as one of your fields
If the rules of your draw say that you need to make a purchase to enter, include a field for them to put in proof of their purchase, for example a ticket number, serial number or receipt number
Don’t include too many fields! If your form is too long or to difficult to complete, you may get fewer entries
What do you need to specify for each field?
For each field, you will give it a name, and then specify whether it should be required, unique, and whether it should show in your draw or not.
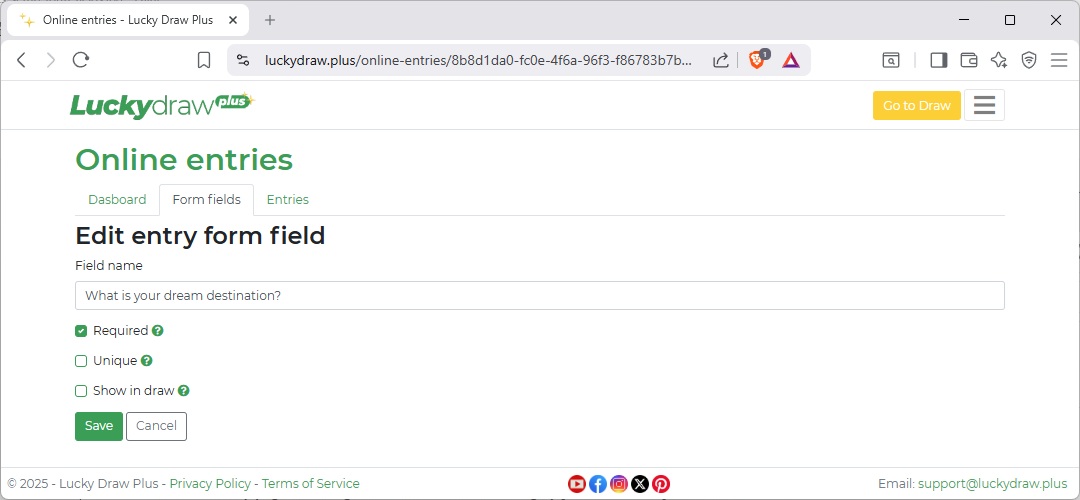
For my holiday contest I have these fields:

All my fields are required, because I want my users to fill all of them in when they enter
Only email is unique. I want each person only to enter once, so once an email address is used, it can’t be used again. However there may be two people with the same dream destination, so I don’t want to make that field unique.
I will only show Full name in my draw when I pick a winner, and keep emails and destinations for my own information
Here are some more details on what to specify to help you set up your fields.
- Field name
The name of your field, as you would like it displayed on your entry form. You can enter the field name in any language.
If you are asking a question, write it out as your field name, for example: How many letters in our company name?
You cannot have two fields with the same name
- Required
For each field, decide if it should be required or not, and if so check the Required flag.
If you have marked a field as required, people will be forced to fill it in before they can save their entry.
Make at least one field required, otherwise people will be able to enter without filling anything in at all.
It’s a good idea to make all of your fields required, unless there is a very good reason why a field should be optional.
- Unique
For each field, decide if it should be unique or not, and if so check the Unique flag.
If you make a field unique, the value or answer for that field will only be able to be used for one entry.
Use this when you want people only to enter your draw once, or where you want to make sure you can uniquely identify a winner. Choose a field that is likely to be unique for one person, such as national identity number. Email and mobile numbers are also unique.
Don’t make a field unique if it is likely to be the same for more than one person. For example, if you make first name unique and a person called John enters, no other person with the first name of John will be able to enter after that.
If you make a field unique, you also have to make it required.
- Show in draw
You may want to collect quite a few fields of information, but only use a couple of them for your actual draw display.
Decide what you want your audience to see when they watch your live draw. Will it be names, or for example ticket numbers?
Check only the fields that you want to show to an audience.
Don’t make highly personal or confidential information show up in your draw if you are collecting it.
You can choose up to three fields to show up in your draw.
You must choose at least one field to show up in your draw.
Editing fields after you have opened live draw entries
Take care with changing your form fields after you have already begun collecting live draw entries.
If you add a new field to your form, the earlier entries will not have this field in them. If you change the name of a field in a way that changes its meaning, old entries might not make sense anymore.
You can change your form fields as much as you like while you are testing, but once you have opened live entries it is best not to change them unless for a serious reason.
Test your entry form
Test your entry form from the Dashboard page under Online entries. You can browse directly to the form with the Browse button, or scan the QR code.
Checklist for online entry form testing:
Your required and unique fields are behaving as expected
Your draw information link is going to the correct place
You are able to enter while Test entries are open
You are not able to enter while Test entries are closed
Your organisation name and draw name are showing up as you would like them
Your background and logo are looking good
The form looks great on both desktop and mobile
You can view your test entries in the entries list and download them to CSV
Try running a test draw with your online entries CSV to see the whole process end-to-end
Once you are happy, you are ready to activate your live form and start collecting entries.
Collect your entries
Activate live online entries
On the Online entries Dashboard, click Activate to activate your live online entries.
Credits required
You will use 10 credits to activate your live entry form. This is a once-off activation fee for your live form - you can now collect an unlimited number of entries with that form.
This fee is for collecting your entries online. You will still use draw credits to do your live draws (one credit per draw) when you later pick your winner.
If you don’t have enough credits available, you’ll be taken to the Credits page, where you can buy or earn more credits.
When you activate, you’ll receive an email confirmation, which will also detail your remaining credits.
Open or close entries
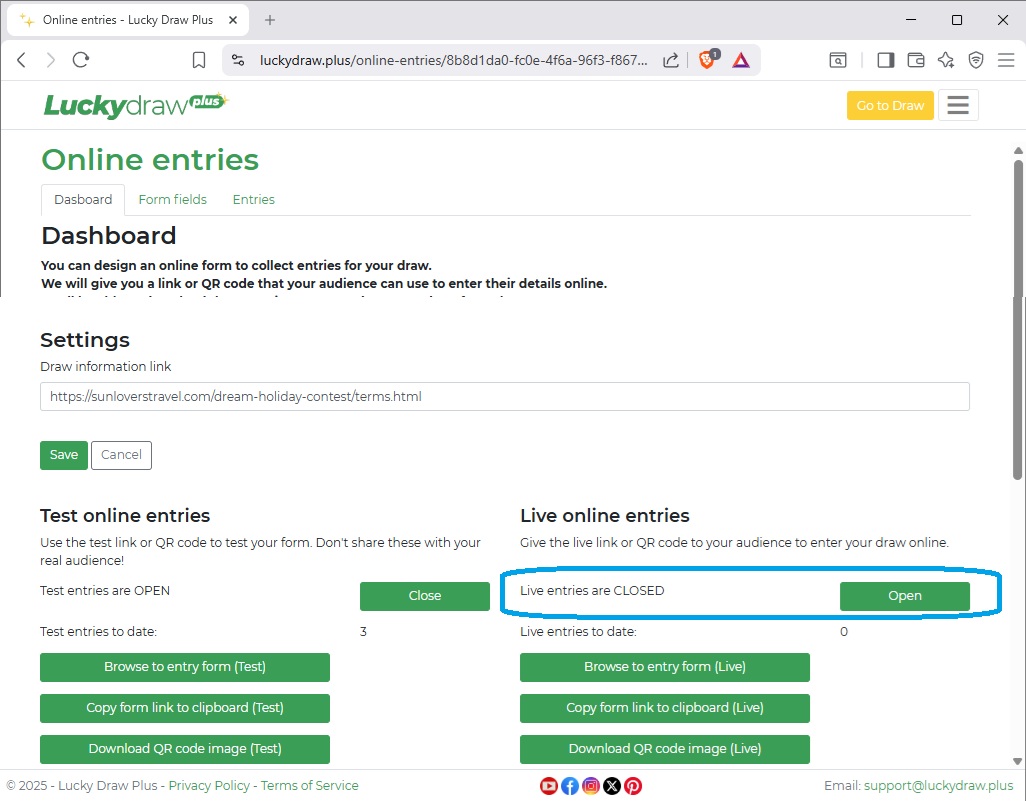
When you activate your live entries, they start off as Closed by default. If entries are Closed, entrants will not be able to enter the draw. This could happen before entries are open, or after the closing date. In this case they will be directed to your Draw information page.
Open or close your live entries as required on the Online entries Dashboard page.
- This gives you full control to
activate your live entries ahead of time
get your live QR code or link so that you can prepare marketing materials
only Open up live entries on the opening date
Set calendar reminders to open and close entries on the correct dates, or when you are ready.
Before you open live entries for the first time, we will check that you have everything needed for your online form to work correctly.
The online entries setup checklist at the bottom of your Dashboard will guide you through anything you still need to do. You will not be able to open live entries until all items on the checklist are complete.
See also Online entries setup checklist
Send your audience to your entry form
As soon as you activate your live entries, your entry form link and QR code will be available on your Dashboard.
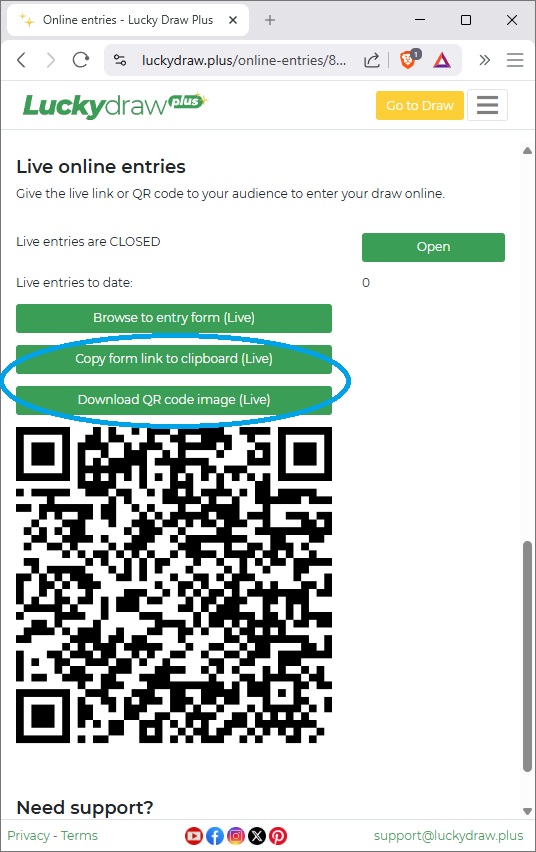
You can:
Copy the link to your clipboard
Download your QR code image file
Publish this to your users in whatever way suits you. Here are some ideas:
Link to your form from your website, social media post or a marketing email
Include the QR code on printed or online marketing materials, for example social media posts, flyers, posters
Print the QR code and display it at expo stands, store entrances or tillpoints
Display the QR code on a device like a tablet so that users can scan it from there
Make sure you have opened your live entries by the time your users will first see or receive your QR code or link.
Monitor your entries
You can monitor your online entries in realtime as they come in, both test and live.
You will see a count of your entries on your Dashboard page.
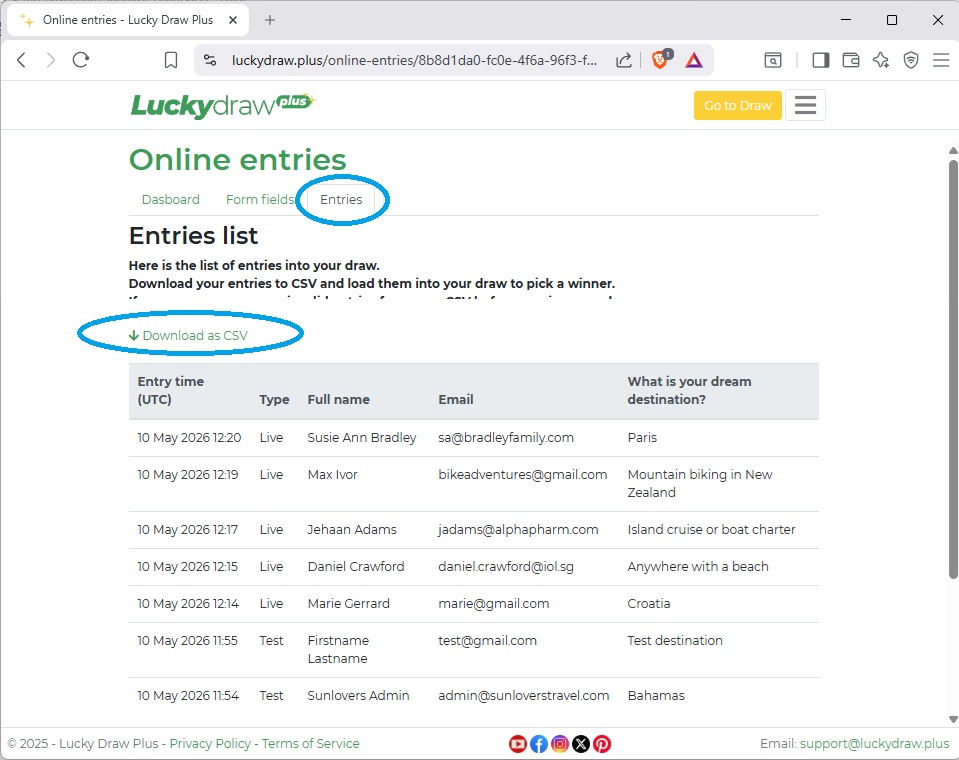
You can also go to your Entries list page to view all entries, validate them, and download them to CSV.
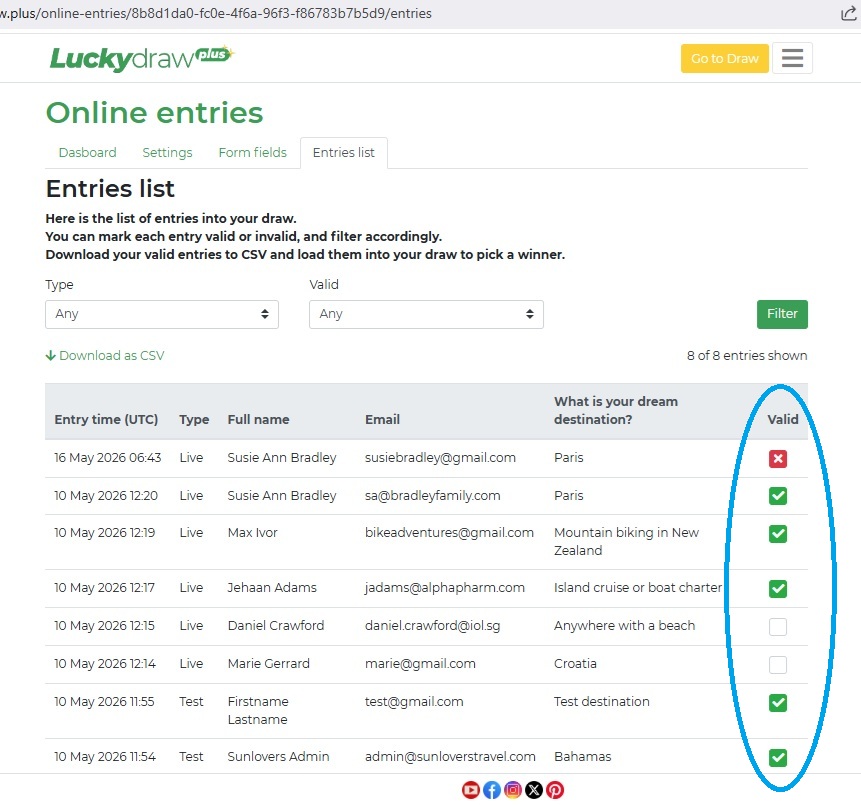
Validate your entries
You can mark your entries either Valid or InValid in the Entries list, and then filter and export accordingly.
Click on the checkboxes to toggle between Valid, Invalid or Unknown.
By default, entries will go into your draw as Valid. You can change this setting, and make all entries go into your draw as “Unknown” until you specifically make them Valid.
See also Check your online entries settings
Run your draw
Prepare your entries file
- From your Entries list page, filter your entries:
Select Live (not Test) entries
Select Valid (not Invalid) entries
Click filter
Download your CSV file.
The fields you selected to include in your draw will be first in your CSV - you can include up to three columns.
Remove extra columns that you do not wish to show on the screen during the draw, for example the entry time and any private information.
Make any formatting changes required. For example you may wish to convert everything to upper case.
Save your entries file as either a CSV or spreadsheet.
Draw a winner
Use your entries file to load entries and run your draw with one of our great draw styles.
Lucky Draw Plus is built to run visually stunning live draws, either in person, or livestreamed virtually, or both!
Full transparency, guaranteed random algorithm, and downloadable winner certificates ensure trust.
Branding, sound effects and winner animation options wow your audience.
|
|

|
See also Load entries
See also Draws